Mar 7, 2015

March Fun Evening
Tuesday the 10th
Time 7.30 to 10.00
4 places remaining
(Clare's suggestion)
We are making Beautiful lace covered books
similar to the ones found on Pinterest. (below)
You can go to town decorating these note books.
or keep it simple.
We are making a loose cover version.

I will supply the note books
Wadding, Satin and lace to cover the book, and a selection of vintage images.

Well I had a go.
so here's mine.


It was harder then I thought

I hand-stitched a removable cover 


This is the book in the cover


I decided to only decorate the front
I added a gathered lace edge, and over-layed the looping trim.
And mounted the image on to card, then added an acetate cover to protect the image.
Added an broderie anglaise frill behind the image, and a lovely gathered cotton lace to hide the acetate edges.
Chose a selection of Guipure applique, and added some ornate pearls to the centres of the daisies  
and a lovely organza rose.


This is the back of the book


You need to bring your own
Needle and thread
Glue Gun
Any fancy lace or applique, you want to use on the front cover of the book.
Beads, Pins, or Bling.
Don't worry if you haven't any of the above, 
I have plenty of extra.

If you would prefer to make cards on the night, please let me know.

If you would like to come please can you email me HERE


Fabric collage book of roses

Needle Book and Garden Apron


Mar 6, 2015

Craft for the Craft March DT Challenge

  
Craft for the Craic
March DT Challenge
Theme, Bingo  

20cm Sq Single Gate-fold
Score the front of card in half.
For the inside
I have matted a pretty 18cm Sq background to
18 and a 1/2 cm Sq pink card
and then to a 19cm Sq gold card.
I found some lovely bingo tags, and vintage bingo images,
which I have matted and layered onto pink then gold card.
and arranged them on the inside wall,
Slipping some lace behind the bingo tags, and in front of the layers,  added some pretty pink roses and leaves and tucking some sparkly peel-off leaves under the roses.

For the front of the Gate-fold
I added a pink and gold panel
and used 2 more of the bingo tags.
And added a 11cm Sq overhanging panel.
And chose a lovely vintage image for the front.
and finished it off with a few more of the pink roses, leaves and peel-offs

Inside side view


You can find Craft for the craic on facebook HERE 
Craft for the craic Blog HERE

please pop on to their blog and Facebook page to see what everyone on the DT is sharing this month.

March DT Challenge for Dragons Lair


March DT Challenge for
Dragons Lair
Theme; More than two folds
This month I have used the beautiful back ground papers and flowers from the 
Simply Soft Collection HERE

I have made a Double Pop-out Gate Fold Card
by joining 2 x 20 cm Sq scalloped cards together
and scoring the front panels in half.

To make the Pop-ups inside I scored 2 x A4 cream cards cut to 19cm by 30cm, and scored both, on the A4 Gate fold, A4 Half fold, and turned card round and scored it again on the A4 Gate-fold.

Folded scored lines and gave them a tight crease with a bone folder.
To stick them to the card inside
I stuck the back wall ones about 3cm in from the edge.
folded the folds shut, and closed card,
so they stuck to the inside gate-folds.
The back wall measures 15cm by 19cm
this is where I have stuck the greeting.
Each fold, front and back has been matted and layered with a contrasting paper, and gold card, 
I have allowed a 1 cm boarder for each panel.
I printed a selection of the daisy flowers in different sizes and cut the out, and stuck the to the 3rd panel on both sides.


The paper I used on the front of card was my own.
and the Fan is from the kit I used last month 
Southern Comfort Elements HERE

I have added some pretty flowers and leaves 
from Wild Orchid Crafts

And a selection of lace from my own stash 


Card fully extended


Inside view of card


Over view of pop-outs

The back panel has been left blank  to add a personal message


Dragons Lair SHOP:  HERE  

Dragons Lair inspirational Blog: HERE  


Dragons Lair Challenge Blog HERE


Dragons Lair FACEBOOK GROUP: HERE 

Don't forget to pop on to Dragons Lair to see what 
 everyone on the DT is sharing this month.
Thanks for looking in
 Yvonne

Feb 27, 2015

A few more to share this week
First Holy Communion 8 by 8 inch


 First Holy Communion 4 by 4 inch


C5 Confirmation

and 1 for the boys

Feb 24, 2015

Pretty and Petite

Yesterdays Cards
Simple
Doily wrapped corners

Wedding Easel card

Side view

this easel has a small card attached to the front for an insert

  • New baby half gate-fold


inside view

Lace wrapped all white card

Anniversary Card

Back view

DL Decoupage rose card

Vintage Birthday card

Double fold Gate-fold Engagement card

inside view

Simple C6 sympathy card

Vintage Best Wishes
Lace Pocket Card

Feb 14, 2015

2 Last minute  A4 Valentine Cards


Feb 11, 2015

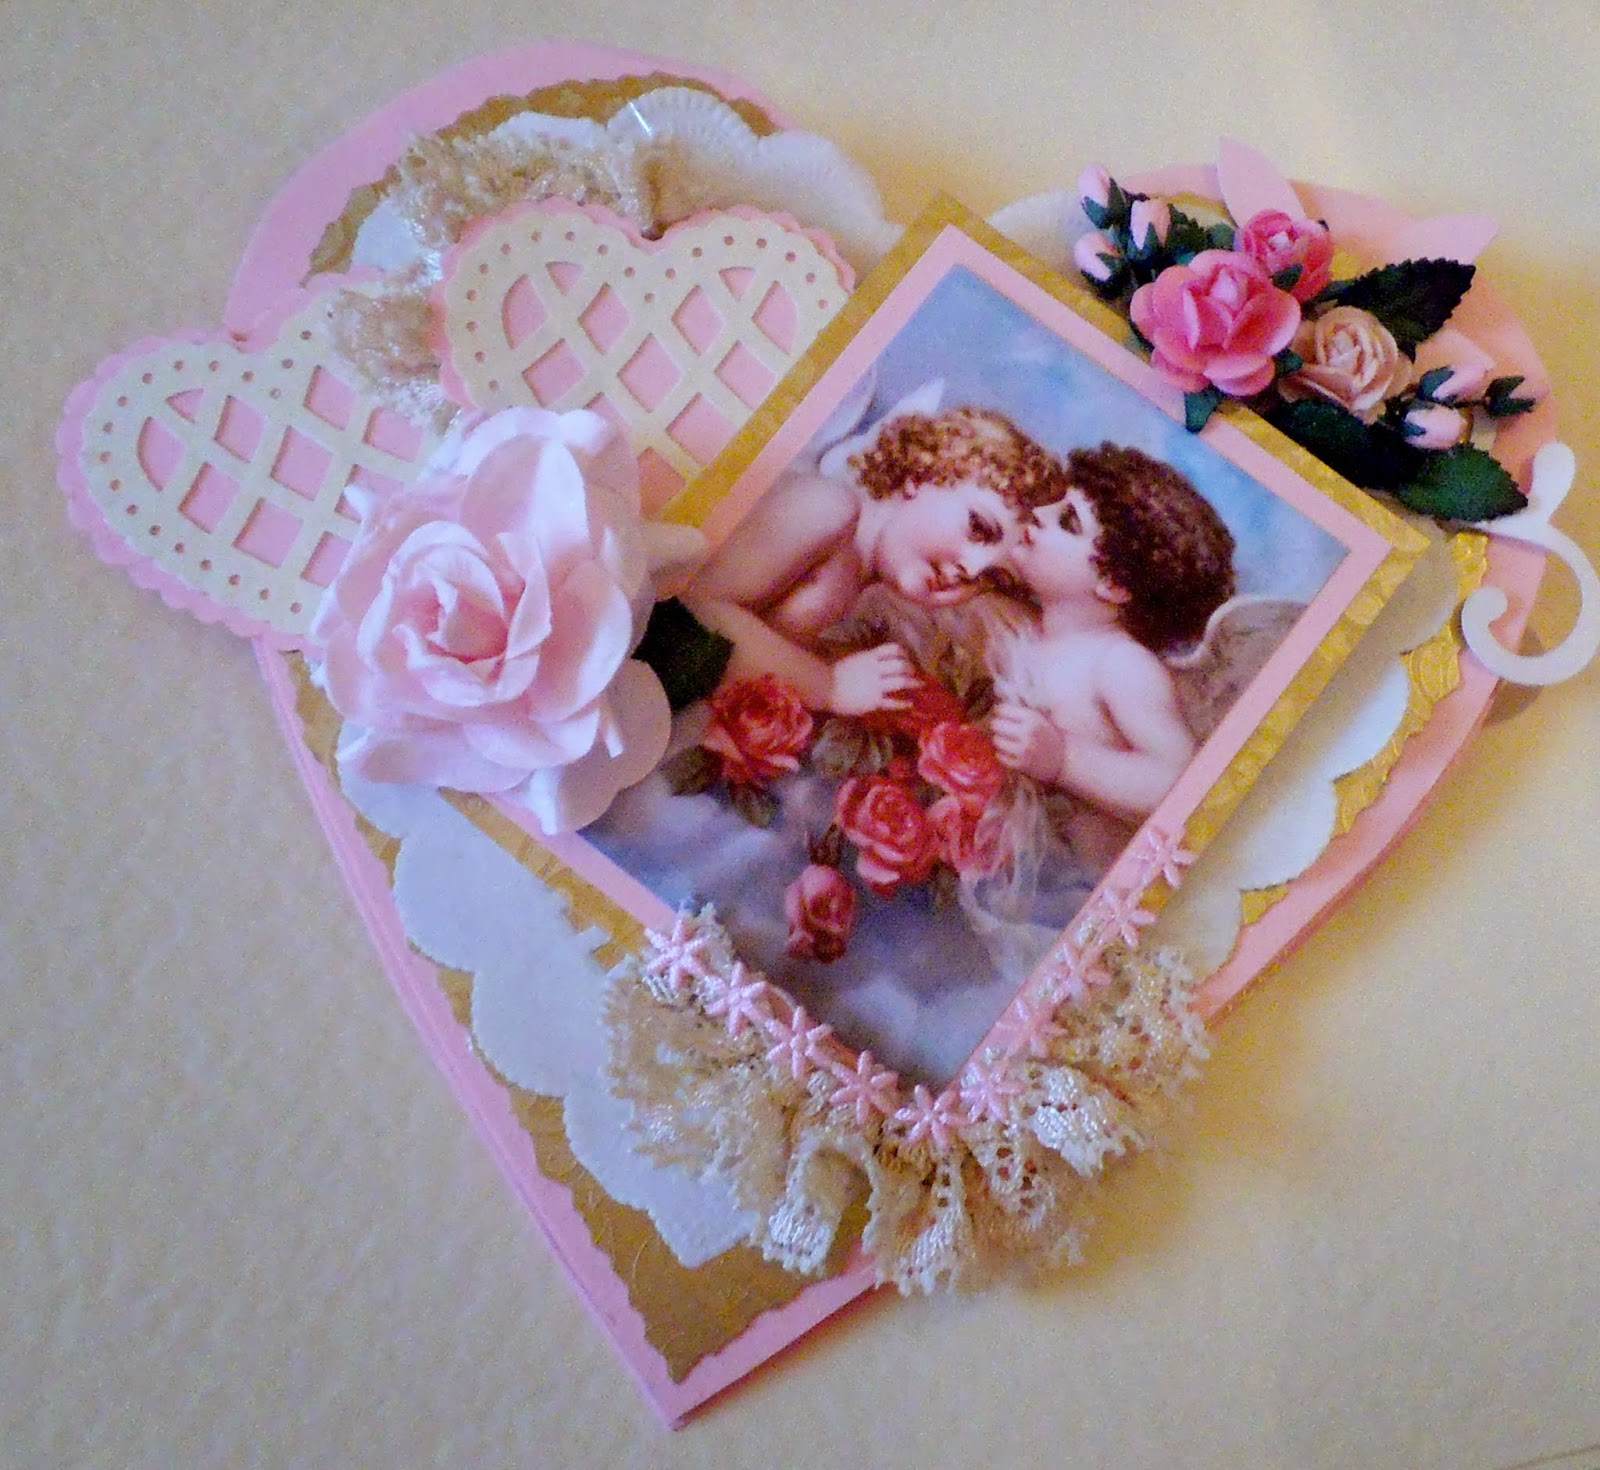
Valentine's Easel Heart

This is the Valentine Card we made last night at the fun night.
Its a Easel  Heart Card
made with 2 hand cut heart cards joined together
and decorated with Die-cuts,  Flowers and lace.


We also made a vintage style Gift box,
will share photos later.


Here are some Valentines from last year

Box gate fold 


Twisted Easel Card


C5 Padded Communion card
This card has a padded front panel
I stuck a piece of quilt wadding to the card and trimmed to fit,
 then over-layed a piece of satin fabric, and secured it at the back.
Over-layed the lace fabric and secured it at the back.
Added the strip of pretty Guipure lace down the side of the panel, and secured at the back.
added a slightly smaller panel of card to secure and hide the mechanic.
and stick it to the pink background layer.
Added a small image and greeting, matted and layered on pink/white/pink card
Threaded the tiny silver cross on to narrow ribbon, and stuck it to the lace strip.
and finished it with a tiny white bow.


Side view to show the padding

6 by 6 inch Christening card.

8 by 8 inch Confirmation card
This one has a handmade ribbon rosette with a silver cross.

A4 Birthday Card
For Downton Abbey Lover


Feb 6, 2015

Craft for the Craic February DT Project

  
Craft for the Craic
February DT Challenge
Theme Birthdays or Anniversaries 

     Anniversary Card
I Chose a lovely kit from Craftsuprint
And added a vintage image to the center . 

1. I  Stuck the gold 19cm Panel to the card front.
3. I tore the printed background panel roughly, (18cm Sq) by tearing the paper towards me, guilded the edges with a gold ink pad using a sponge  and stuck the panel to the gold card.
4.  I scrunched the lace so that it wasn't flat. and stuck it to the center of the card with double-sided tape.
5.   Added the cotton lace to the top right and bottom left corners,
6.   Cut out the decoupage sheet, and stick the main image to gold card.
7.   Build up the 3D image with the decoupage layers.
8.   Cut out the greeting, and stick to gold card allowing a ½ cm boarder.
9.  And stuck the bow to the bottom left hand corner of the main image.


You can find Craft for the craic on facebook HERE 
Craft for the craic Blog HERE

please pop on to their blog and Facebook page to see what everyone on the DT is sharing this month.
Thanks for looking in.
 Yvonne xx

Dragons Lair February DT Challenge


February DT Challenge for
Dragons Lair
Theme; Hearts and Flowers


I have used the pretty layered frame from 
Southern Comfort Elements HERE from Dragons Lair 

1. Added a pretty torn pink background which I inked the edges with a Tim Holtz distressed pad (Spun Sugar)
2. Added a lace edge to the left of card.
3. Matted a cream polka dot background strip to gold, 
and wrapped pink ribbon and a lovely cream lace strip, 
this was stuck to the card with double-sided foam tape.
4. I stuck a cream heart doily to the top right of the card
I lifted the top of the doilies with foam tape, 
5. And inked the white heart doily with the spun sugar ink pad,
which I over-layed onto the cream heart. 
6. I torn some cream card to a similar shape as the frame and then inked it ,and stuck the framed raised on foam tape overlaying the cream polka dot panel.
7. Added a small punched pink heart to the bottom right of the card, and added some cream roses and leaves, a little narrow pink ribbon bow, and a small lace bow on top.
8. Added a 2nd punched pink heart below the main frame. with a punched lace cream heart on top
9. Typed a greeting and inked the edges to match.


Dragons Lair SHOP:  HERE  

Dragons Lair inspirational Blog: HERE  


Dragons Lair Challenge Blog HERE


Dragons Lair FACEBOOK GROUP: HERE 

Don't forget to pop on to Dragons Lair to see what all the 
 everyone on the DT is sharing this month.
Thanks for looking in
 Yvonne